Because every kid remember’s their first Bee Day party right?! Okay, okay I know what the naysayers are gonna naysay. But regardless of whether Callie Grace will remember this day or not, I wanted to make it special for her and for us as well. Giving birth was no easy feat, and sometimes I think we forget as birthdays go by, that mom was a part of that special day too. And yes even dad, a little. So sue me if I want to celebrate myself a little bit, alright? (Please don’t sue, I like throwing parties and making my daughter the center of attention, no legal action needed).
I wracked my brain for the perfect first birthday theme for Callie’s birthday. And trust me there are a lot of themes to chose from. I searched Pinterest for months in advance scouring for the perfect theme. One that I could make beautiful and that also spoke to Callie Grace and the little human she’s been becoming. And then I saw it. A First Bee Day party. You guys, it was PERFECT! And let me tell you why.
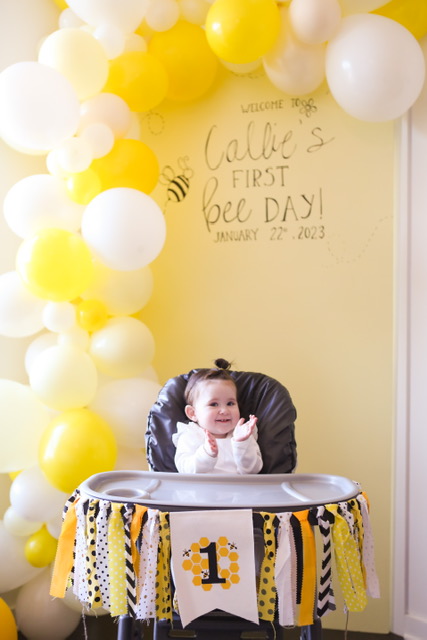
The very first toy that ever made my girl smile was a little mirror with a bumble bee on it. I have it linked in this blog post that lists all my baby registry essentials. For the longest time, I thought she was smiling at herself in the mirror. I was like, “dang this kid thinks she’s real cute”. But as I paid closer attention I noticed that it wasn’t the mirror she was smiling at. It was the cute little stuffed bumble bee attached to the frame of the mirror. For months, I would use that mirror and the bumble bee to get Callie to smile for pictures. It’s held a special place in our hearts. So how could we NOT throw her a Bee Day party?
There’s lots of things we did to try and make it special. Between the decor, food and drink, we attempted to transform our 877 square foot condo into an event space. And even crazier, an event space that would fit up to 40 people. It was a feat, but we did it and did it well if I do say so myself. We were conflicted on where to host the party. My daughters birthday is in January, which makes outdoor parties a bit more difficult. We had more people attending than we initially expected, so we were nervous about space in our condo.
We started looking into renting an event space. The cost along with flexibility of having all our own decor, food and drink ultimately made us choose to host at our own home. And I am SO glad we made that decision. It came out so beautiful. Callie was also so comfortable because she was in her own home, which meant she could crawl around as she pleased and play with all her own toys. And we loved being able to make all our own decision when it came to food and drink as opposed to having to choose what an event space was offering. Overall, it was honestly one of the most special days of all our family and friends celebrating our sweet girl. Here’s some little ways we added to her special day.
Bee Day Party Decor
Balloon Garland
I was SO excited about this theme and all the possibilites for the decor. I found some inspiration on Pinterest but honestly was surprised at the lack of Bee Day party inspiration I found. The first thing we knew we wanted was a backdrop with a balloon arch. We considered just having this done and delivered. But the cost made us think maybe we could turn into balloon experts for a day. So we got some DIY kits from one of our favorite local shops, Rock Paper Scissor.
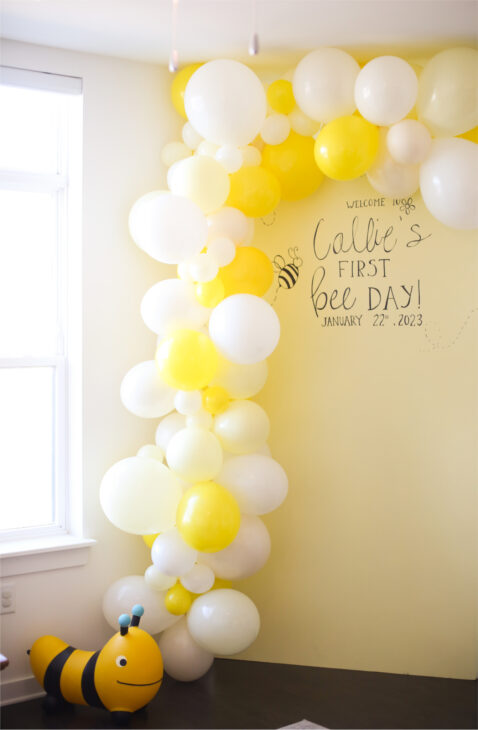
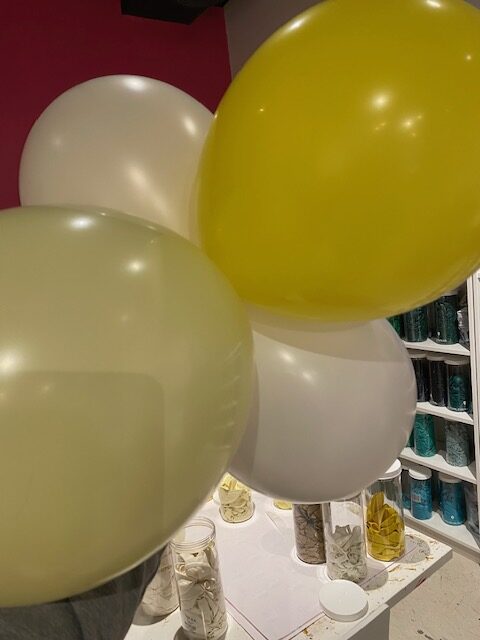
Their DIY balloon garland kits are so reasonable. You can go into the store and look at the color options, which I love. It makes the process a lot easier than picking online, trying to guess what they will look like in real life. We chose four colors that we loved and that made the rest of the decor a lot easier since we had a color palette to stick with. We went with more neutral, pale yellow colors because we didn’t want it to be too bright or cheesy looking. The colors we chose are white, ivory silk, yellow and lace. Here’s the colors from when we picked them in store.
Backdrop
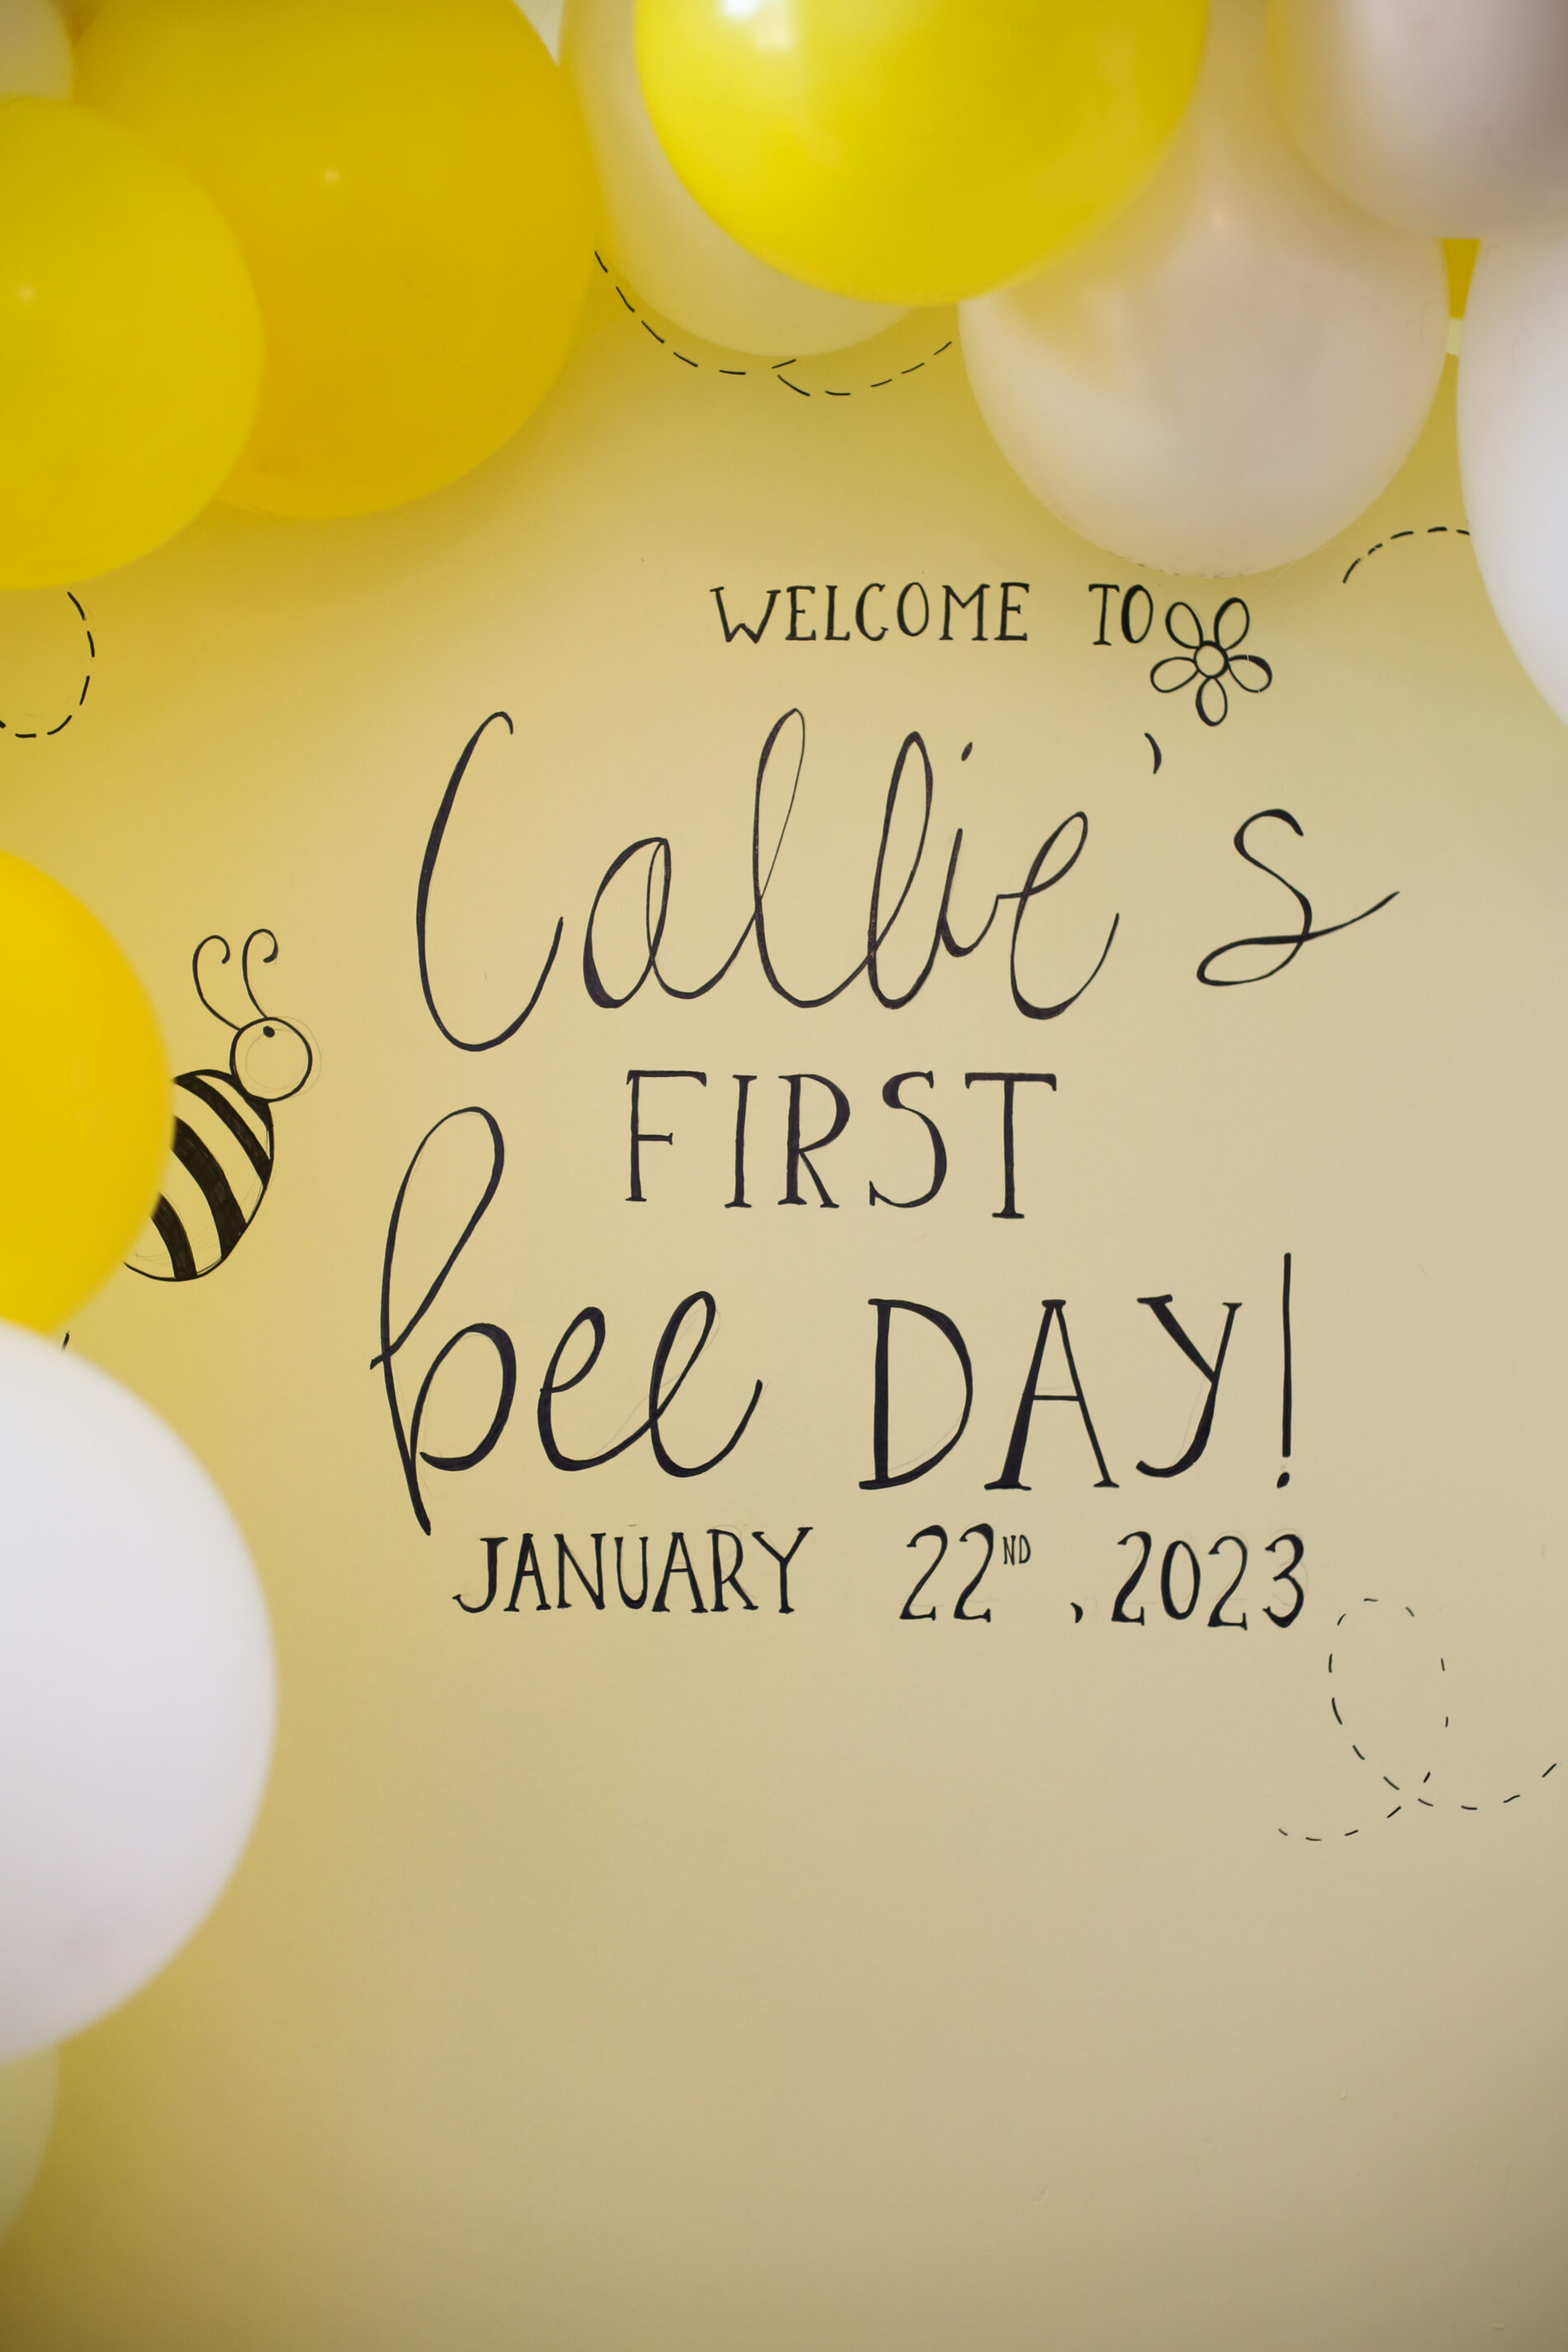
From there we knew we had to figure out the backdrop situation. We knew we had to keep it simple but wanted it to look beautiful too. I was looking up tutorials to see how other people did it and stumbled across this one. It looked so simple and easy to do so hubby and I decided this was the way to go. We went with one big board instead of multiple boards because our space isn’t huge to begin with. I didn’t want to clutter up the space and make it feel smaller. I mean, we were already worried about fitting all our guests in our condo.
We purchased one 8 foot foam board from Home Depot, which you can find here. I also took the balloons with us to help us pick a paint color that matched. We traced the rounded top with pencil and my husband cut it with a box cutter. It wasn’t perfect at first. But we went over it and smoothed the edges and also knew that balloons would be covering some of the top as well. I would say it took about 3 coats of paint to get it perfect.
Now I have been blessed with an artistically creative mother-in-law. So I told her what I wanted the board to say and sent her some Pinterest inspiration for the font. She literally had the sign on the board done within 30 minutes. She is incredibly talented and it blew me away! Another option you could use is Cricut. This is what I would have used had my mother-in-law not been blessed with her creative eye. You could also buy some wooden letters from Michaels and paint them and use wood glue to glue them on, depending on what you want it to say and how many letters you need.
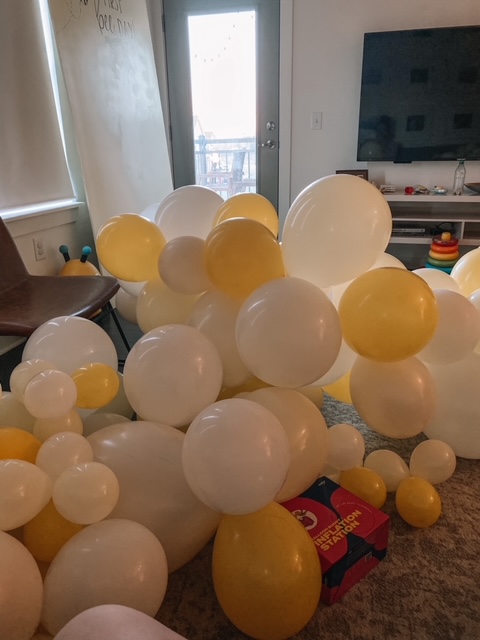
Now in terms of getting the board up and stable, my husband and his grandfather did a lot of the grunt work. But ultimately they used a hook to anchor it to the wall and it worked perfectly. The nice thing about the board we used is it is super lightweight so it made it easy to maneuver. The next thing we had to tackle was the balloon garland, which I was honestly the most worried about. We blew up the balloons the day before the party and attached it to the string provided by Rock Paper Scissors in order to create the garland. Here is a picture of the chaos that insued:
I also feel like I need to mention that I am and have always been scared of balloons (I just looked this up and apparently this is called globophobia). I say this as a joke but also it is not at all a joke. Some people have clowns, I have balloons what can I say. I have always been scared of sudden loud noises. Like deathly afraid of fireworks and flushing the toilet when I was little. So balloons are my worst nightmare considering they could pop at any moment and I won’t know it’s coming. I know, I know this sounds crazy. But luckily I have a husband and best friend who tolerate my crazy. They let me hang out in my bedroom with my daughter while they blew up all the balloons. They are the real MVP’s let me tell you.
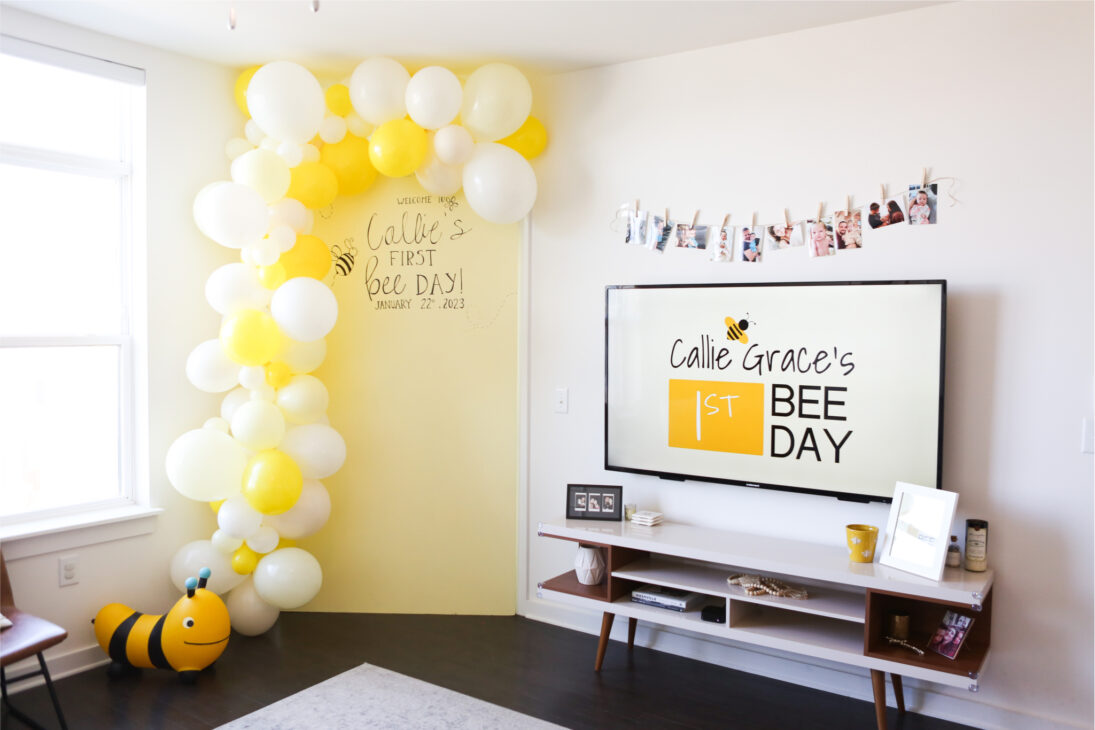
Once we (they) had all the balloons blown up, we started to string them into the garland. I wish I could tell you the best technique for this but honestly it was a lot of trial and error. Rock Paper Scissors did provide super helpful instructions, but just doing it is really the best way to learn. So that’s what we did. And honestly I am so proud of how it came out considering we were on a time crunch and it was our first time doing it! If you are nervous about a DIY kit and doing it yourself, I would encourage you to try. You may surprise yourself and save some money in the process. But if you’re scared of balloons make sure you have support (again, joking but not).
Welcome Table
So once we had the backdrop and balloon garland squared away, it made the rest of the decor fall into place. The layout of the party started with our entryway that had the guest book for people to sign. I found this precious kids bee book called “The Honeybee” on Amazon that was perfect as a guest book. My mother-in-law picked up some small clothes pins at Target. We used them to pin pictures of Callie throughout her first year on this tapestry we have in the front room over the welcome table.
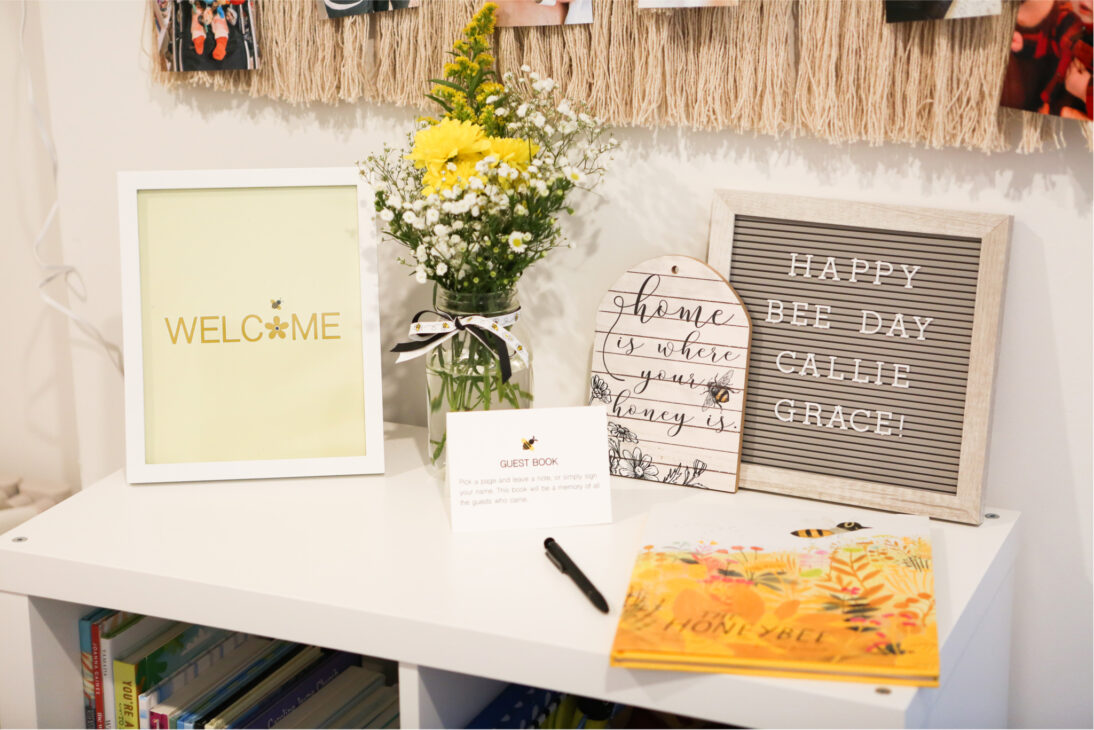
We also have big mason jars that I used for flowers that I got from Trader Joe’s. I put them all around the house, including one at our welcome table. I found the cutest bee themed ribbon on Amazon that I tied in a bow around the mason jars and they came out so cute! We set this front area up with lots of Callie’s toys and made a space to play for any of our friends who brought their little ones!
Food and Drink Stations
Past the front room is our kitchen and we used our kitchen island for all the main food. I got some simple black and pale yellow plates and napkins from Party City for the food. I put one of the mason jars of flowers on the island. Also, I used these freaking cute bee tooth picks to tie the food in with the rest of the decor. They are seriously so perfect for a Bee Day party. We have some space above our kitchen cabinets and we had a ton of left over balloons, so we wound up filling that space with the balloons to add some height and dimension to the kitchen and it really helped tie everything together.
Crazy story, we actually went into Michael’s to look for ribbon. We walked in and they had an entire Spring section in the front of the store with bee themed items. It was like fate. So we bought a few signs (cause they were too cute not to get) and one of them was this “Hive Rules” signs that we wound up putting on the kitchen counter. It was too perfect for a Bee Day party. We used one of the other signs we got from our fate filled Michaels trip that said “Home is where your Honey is” on the welcome table in the front.
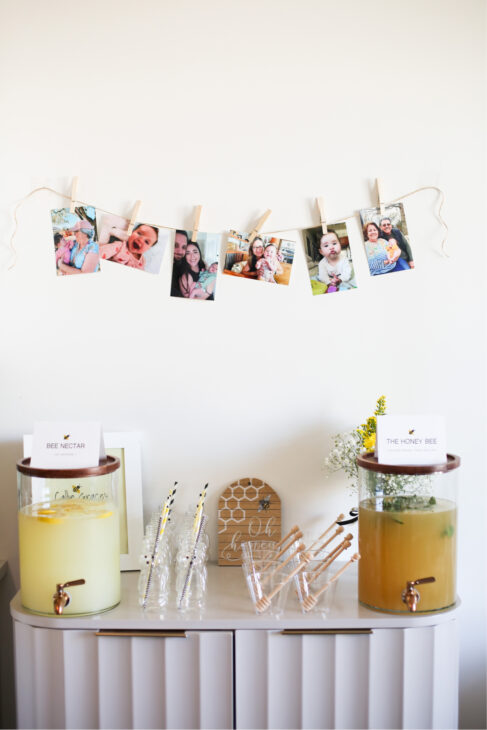
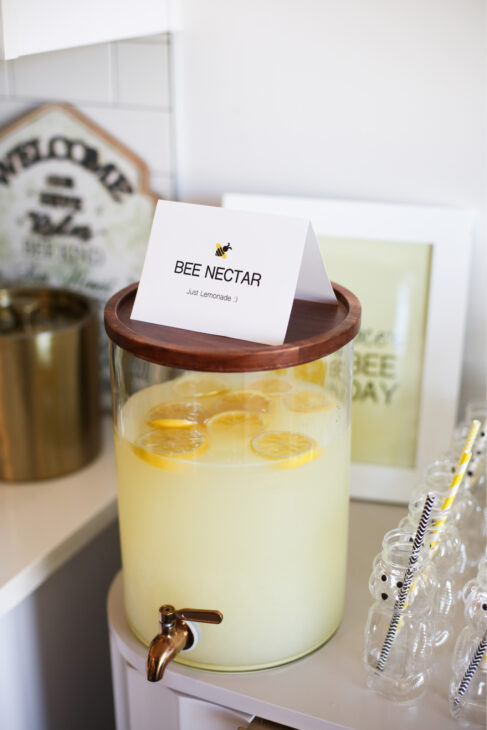
We used our bar cabinet as a drink station that turned out so cute. I got two drink dispensers from Target and used one of them for Lemonade (or Bee Nectar as we called it) and one for our cocktail. I used the same clothes pins as I did above the welcome table and pinned some more pictures of Callie on twine over the drink station. Honestly people loved all the pictures of Callie, everyone spent some time going around and looking at all of them. It took me weeks to take them down after her Bee Day party cause I loved them so much. And they looked so cute and simple. Definitely a hit.
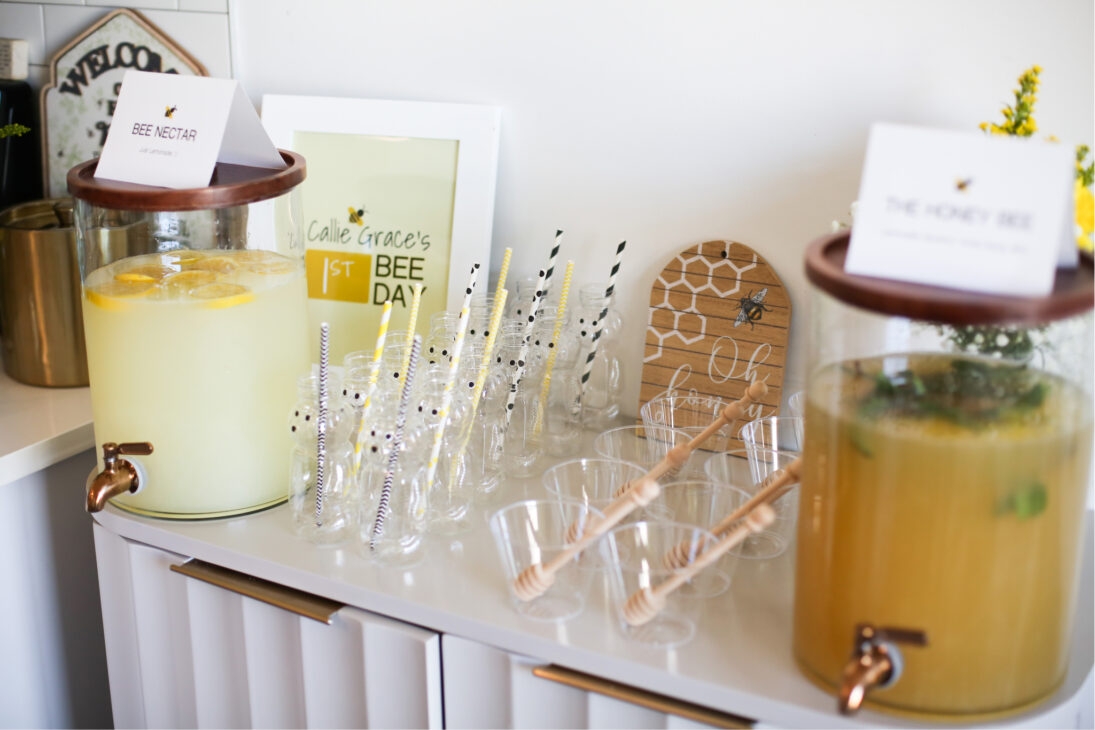
I found the cutest little honey bear containers for the lemonade and yellow and black straws for them. Both I found on Amazon and they looked SO cute together! The honey stirrers for the cocktail was one of my favorite little details. Too stinking cute and tied in with the theme perfectly. I put them in super simple clear cups we got from Party City and they were perfect. We really tried to decide where we wanted to splurge and where we wanted to save, so Party City was our saving grace for that. Obviously we wanted Callie’s Bee Day party to be perfect, but we were also on a budget here as I’m sure many of you are as well. So it’s important in some ways to go ahead and splurge on special pieces but find lots of ways to stay simple and affordable in others.
I put one of our Michael’s signs that said “Oh, Honey” behind the drinks as well as another mason jar of flowers. My husband designed some signs for the Bee Day party that we placed in white frames we got from Target so I put one on the drink station as well with the logo he designed for the party. He is honestly so talented with digital design and I am always amazed by what he puts together. He must get it from his mama! We also had a “Welcome” sign on the welcome table he designed. They were so cute and really made our tablescapes pop.
Our kitchen is connected to our living room which had the backdrop and lots of open space and seating for people to hand out, eat and mingle. One of my favorite things we did was use our Apple TV to make a slideshow my husband designed on displayed on our TV. It had so many cute pictures of Callie, facts about her birth and facts about her now. It had all her favorite things and her party logo as well. People loved watching it and getting to learn all about Callie Grace. Honestly, it saved us a lot of money in signage being able to put information in the slideshow instead of having multiple signs for all that we put on the TV instead.
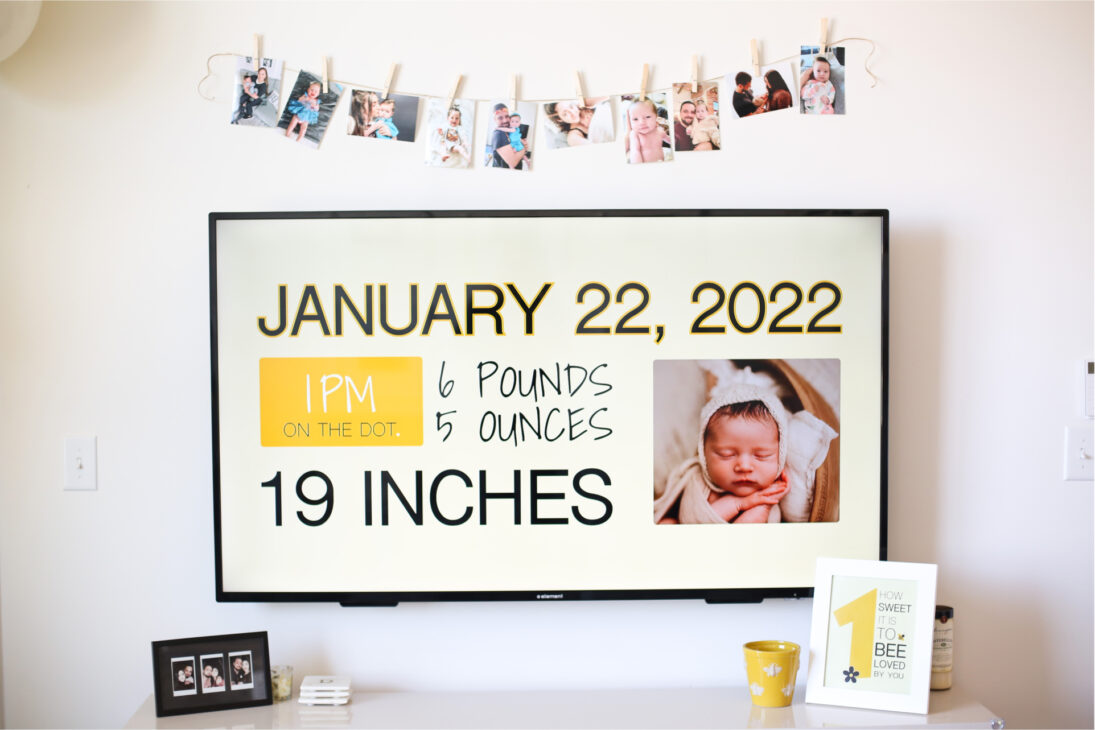
It was super simple to do, my husband designed the slides in a program called Figma, but you could easily do it in Canva as well. He saved the slides as images and then made an album in his photos of all the slides in the order we wanted. Then you can play a slideshow through the Apple TV for a specific album and customize it so you can have a certain number of seconds that each slide plays. It’s so easy and such a special and custom touch!
The little details I added to the living room were simple but perfect for the space and theme! Again, I hung the pictures above the TV with clothes pins and twine. I also put a cute little yellow bee pot on the TV console that I got from, you guessed it, Michael’s. We also put another of my husbands signs in a white frame by the bee pot that says “How sweet it is to be loved by you” and it looked so precious!
Dessert Table
You guys. We did something crazy. We may or may not have actually used our own bedroom as the dessert and gift area. Like I said, our place is not huge so we had to work with the space we had. I was a little nervous people would think it was weird, but it came out SO cute and the dessert table was actually one of my favorite parts of the party. We put the dessert table up against the main wall of the room and put up more pictures of our girl with clothes pins and twine above the table. Our home was basically a shrine to our daughter. I was definitely not mad about it though.
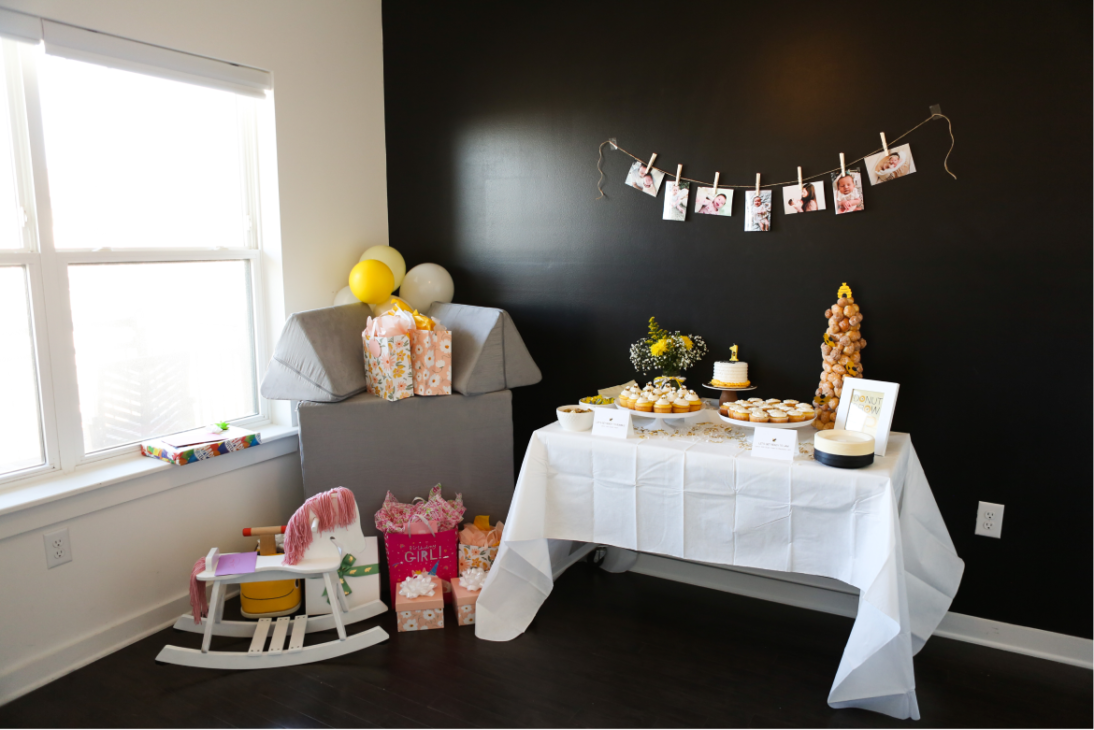
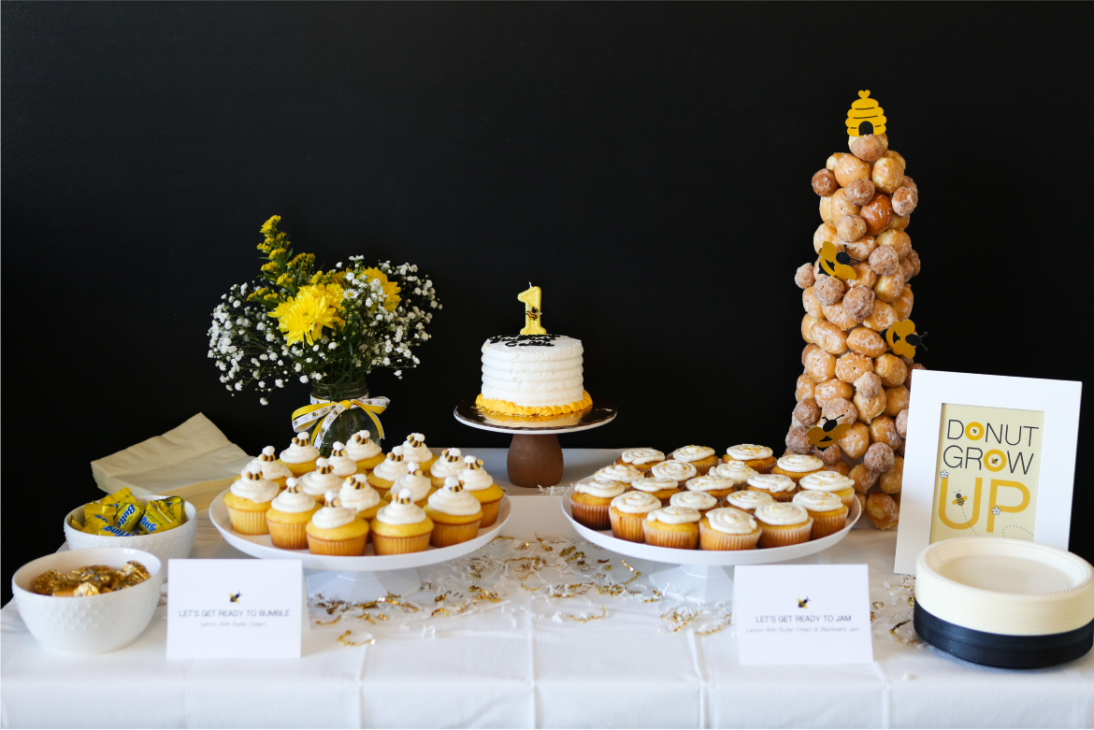
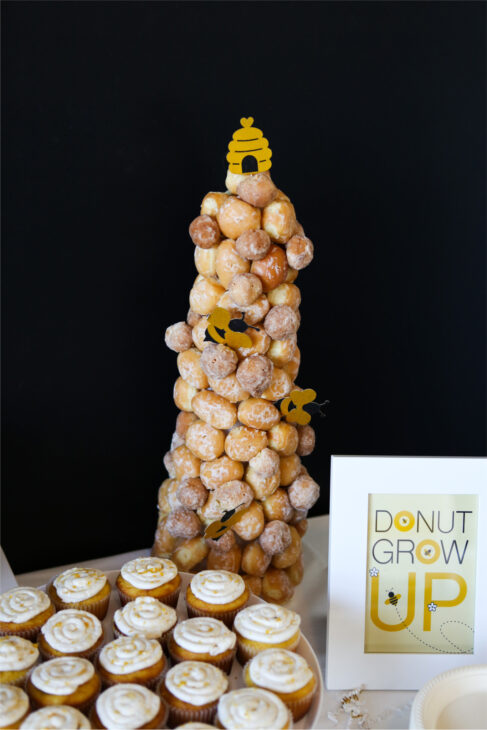
I’ll touch on the food specifics in a moment, but I did have another mason jar of flowers on the table and used Party City plates and napkins. The table cloth and the platters for the cupcakes were also from Party City, but the cake holder is one I’ve had from Target. I put together a donut hole tower, so naturally we made a sign that said “Donut Grow Up” which I thought was so stinking cute. We put all her sweet presents next to the dessert table in the corner of the room.
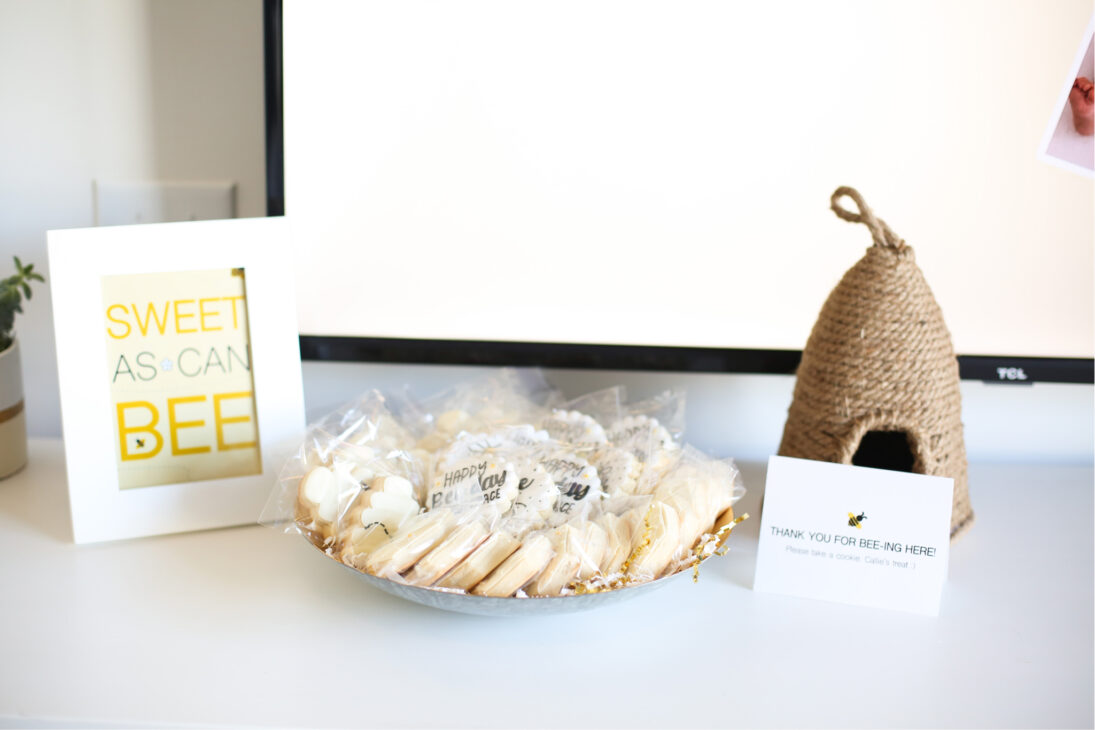
There is also a TV on the wall of our room opposite of the dessert table and a dresser underneath. We had the slideshow going on that TV as well. One of my other favorite Michael’s purchases was a jute bee hive that we had on the dresser under the TV which was really aesthetic looking.
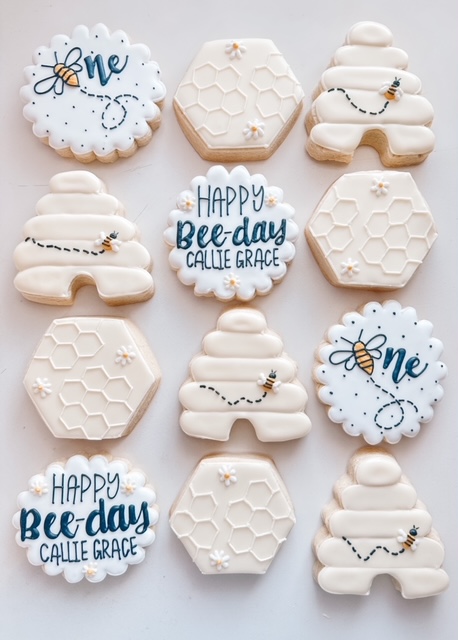
I had a silver and gold bowl that I used to put her favors in, which were the cutest cookies I’ve ever seen. Longdog Cookie Company brought my vision to life and made the cutest bee themed cookies ever. People loved them and also said they didn’t only look good, they tasted delish as well! I put another one of my hubby, Luke’s signs that said “Sweet as can bee” next to the cookies. My husband also designed some cute tent cards and made one for the cookies that said “Thank you for bee-ing here! Please take a cookie. Callie’s treat!).
Bee-Themed Food
I seriously had the hardest time figuring out food that would be simple and also on theme. I tried so hard to fine options that looked like a bee hive or something bee themed. What I discovered is that most anything can be on theme if you name it something clever. One of my biggest things was that I didn’t want to be cooking or still working on food when guests arrived. One of the most stressful things is trying to entertain while also simultaniously trying not to burn food. So in an attempt to make it cute, easy and punny, here’s what we did:
Charcuterbee Board
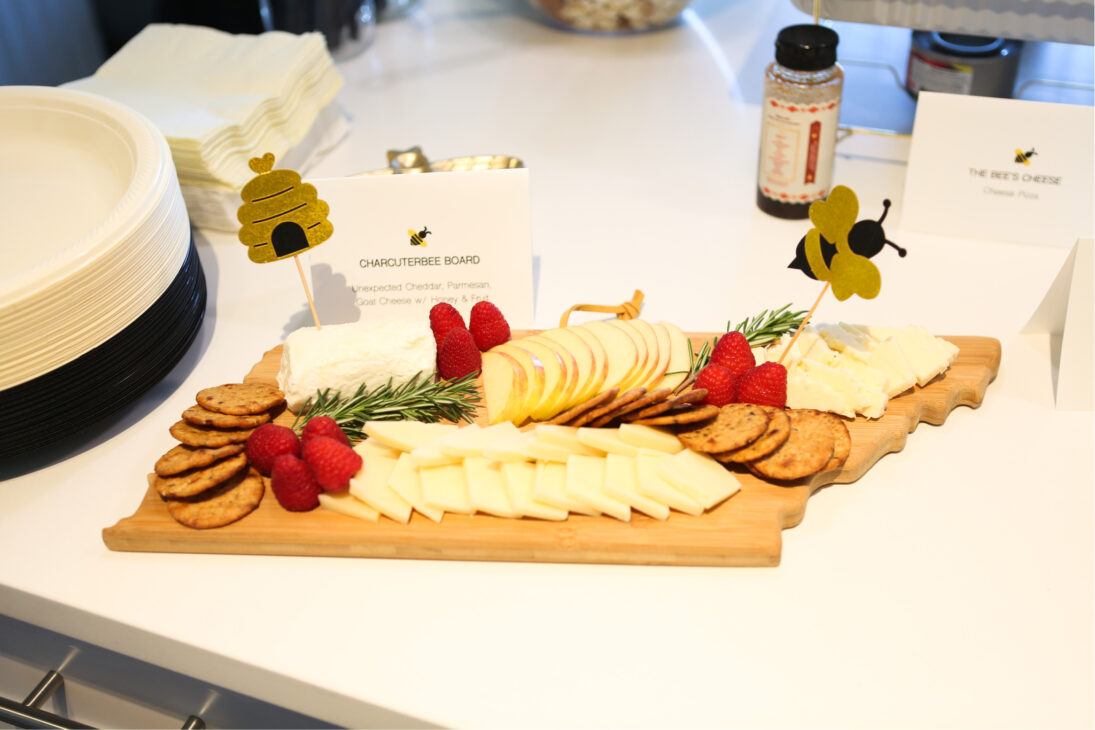
I wanted a food option that was light and easy to pick at while mingling and this felt like the perfect option. I mean who doesn’t want a cheese board at any party they go to? The cheese board is one I have had for years that I love, so I used that and got some cheese from Trader Joe’s that are always a hit. The Unexpected Cheddar from Trader Joe’s is always SO yummy so that was a must, and then I got Parmesan to keep it simple and then some Goat cheese with honey. I sprinkled in some raspberries, apples, crackers and rosemary and decorated it with some of the bee themed tooth picks we got on Amazon and it came together so well and look adorable. Perfect for any Bee Day party!
The Bee’s Cheese and The Bee’s Cheese w/ Pepperoni
For a main entree, we struggled deciding but ultimately came to the conclusion that pizza was the best way to go! It’s easy and everyone loves it. We got a few pies from our favorite local pizza place (Midnight Oil in the Nations if you’re in Nashville and want to try it out, SO good). My husband cut the pies into squares so that they were smaller pieces and easier to grab and go. We also made sure to leave out some Mike’s Hot Honey for anyone who wanted to add a little spice and keep everything on theme.
Chick-Fil-BEE
Nothing at a party is more of a crowd favorite than Chick-Fil-A nuggets. And whatever you do, don’t forget the Chick-Fil-A sauce (it’s the best and not up for discussion). But for real, every time we get these for a party, there are zero left overs. And once again, being clever with the name on the tent cards is all you really need to keep in on theme! We did use some of the cute bee themed tooth picks again just to tie everything together, so I definitely recommend getting those. They come with so many in a pack you really only need one!
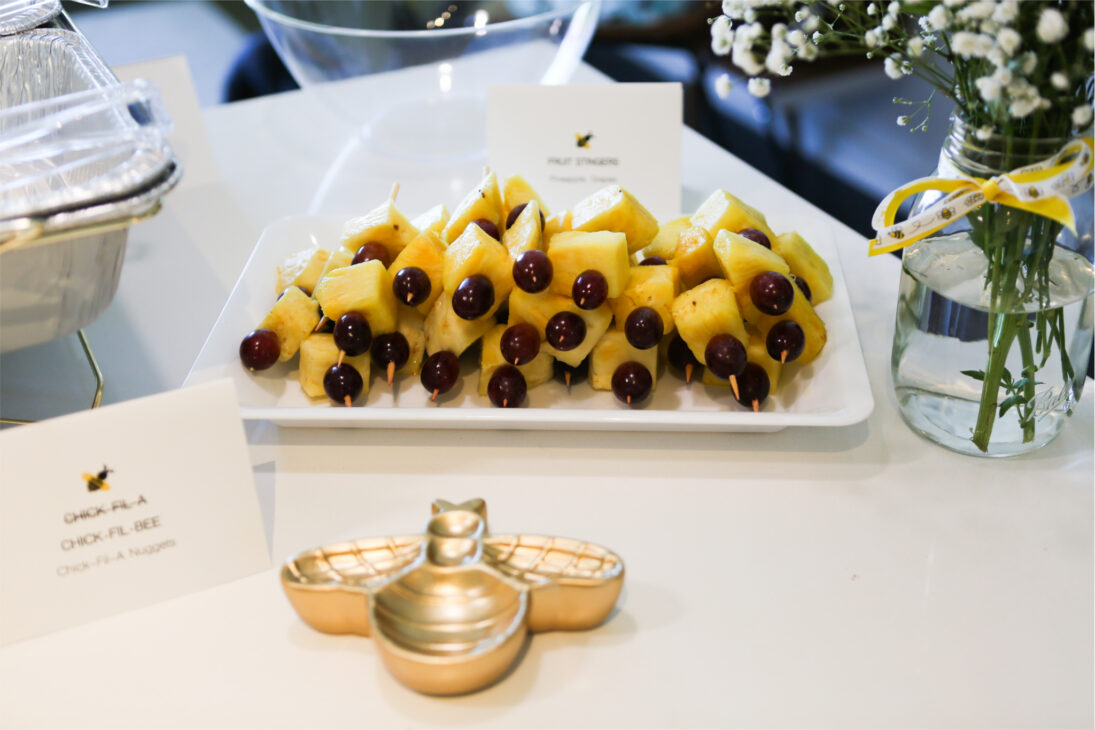
Bee Stingers
This is an idea I saw on Pinterest and thought was so cute! All you need is skewers, some red grapes and pineapple. Such an easy idea and a nice way to add something a little lighter to the menu. They are easy to grab and eat which is nice for a party with lots of mingling. And they looked so pretty with pretty minimal effort!
Honey, I Baked the B(ri)EE
Okay this was definitely my idea, and even though my husband said this pun didn’t work I’m very proud of it. I didn’t really follow a recipe for this one, I kind of wung it. I just got some Brie from Trader Joe’s, cut off the top, and baked it with honey and rosemary on the top in a skillet. It came out super creamy and yummy. I made sure to have lots of dipping options like baked baguette, soft pretzel bites and crackers.
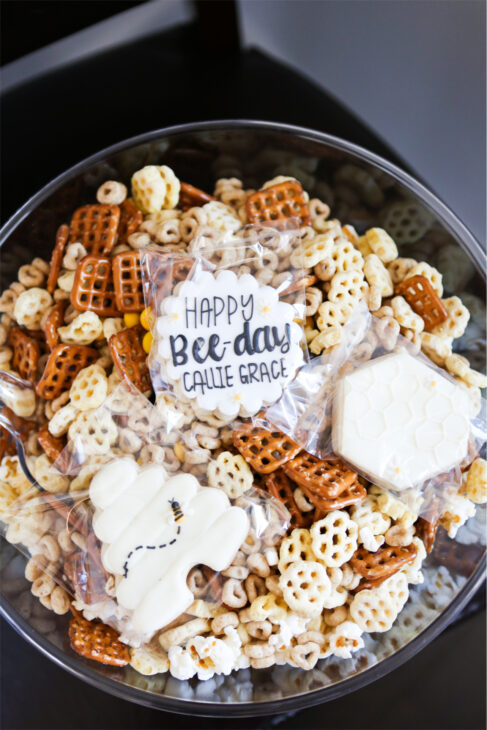
Honeycomb Snack Mix
This was also a Pinterest idea! It came together so easily, the only hard part is picking out specific colored M&M’s to fit the Bee Day party theme. We got Honeycomb cereal, Honey Nut Cheerios, Smart Pop Popcorn, pretzels and M&M’s and mixed them all up. It looked so cute and was perfect for the party.
BEE-falo Chicken Dip
This dip is a famous one that my cousin always makes. I make her bring it to every party she comes to because it is THAT good. She sent me the recipe which you can find here, so try it for yourself and tell me it’s life changing cause it is.
Bee Day Party Desserts
Dove Chocolate and Butterfingers
These are pretty self explanatory but chocolate is always a must at parties. Give the people what they want!
Cupcakes
One of my best friends is a really talented baker, so she helped us out with the cupcakes. They turned out SO CUTE! She did two flavors, one vanilla and one vanilla with blackberry jam in the center. I found these cute bees to go on top of one of the flavors, and she put lemon zest on top of the other flavor. We made up cute names for them like “Let’s Get Ready to Bumble” for one and “Let’s Get Ready to Jam” for the other one with jam in it. They were such a hit and looked so good on the dessert table.
Publix Smash Cake
So we initially were going to go to one of our favorite local shops for a smash cake. When we found out it was going to be $65 we decided to look into other options. Normally we wouldn’t mind, but no one except for Callie was even going to be eating the cake. So it wasn’t something we really wanted to spend much money on. We just wanted it to be cute enough and simple. So we went to Publix because I’ve heard people rave about their bakery and cakes.
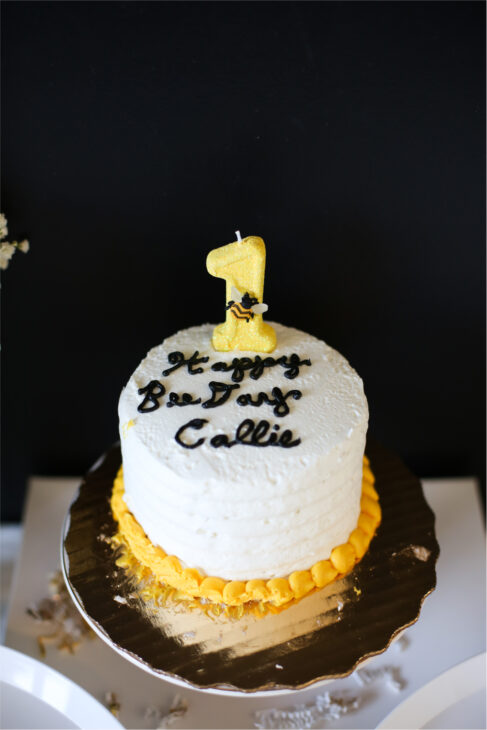
They made it so easy and y’all, it was so cheap! Like $14 for her little cake. It came out so perfect, I was so happy with it. Honestly she didn’t even really eat much of it so it wouldn’t have been worth a more expensive cake anyway. I really liked having the cupcakes for the adults and only having the cake reserved for Callie! I didn’t have to worry about cutting cake and serving it to anyone which was so nice. And the cupcakes were so cute that it didn’t feel like we were missing a big fancy cake for the adults as well!
Donut Hole Hive
This was a Pinterest find for me and I was obsessed with how it came out! We purchased a styrofoam cone from Michael’s and some toothpicks and that’s basically all you need. You just insert the toothpick and then add the donut hole onto it and keep going until it’s fully covered! We also added some of the bee themed tooth picks as decor on it and it came out so cute. Especially with the “Donut Grow Up” sign, it was such a fun touch and bonus: we ate donut holes for days.
Drinks
Lemonade
You can’t have a Bee Day party without lemonade, I don’t make the rules! Not much to say about Lemonade, cause it doesn’t get much more simple than this which is why I loved it. It was cute with the theme and having it in the little honey bear jars was so cute! I also cut up some lemon and threw the pieces in there. It spruced it up and made it look more homemade (even though it definitely was not).
The Honey Bee Cocktail
This one, I was against. I wanted so badly to not have a whiskey cocktail solely based on the reason that I don’t like whiskey. But my husband loves whiskey, so he found a recipe and just asked me to try it. It was so good that I still ask him to make it for me randomly because I crave it sometimes. So simple, and so yummy that people still tell me how good it was and ask for the recipe. He put some mint in the drink dispenser which made it look so pretty and extra yummy! I can’t recommend this recipe enough for a Bee Day party.
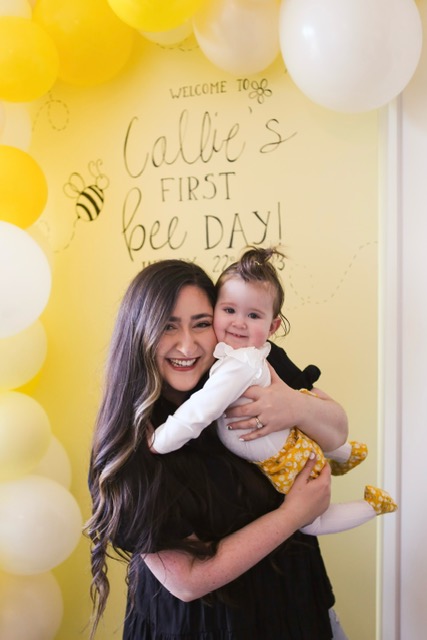
Well there you have it! All the details of our girls special Bee Day party. It truly was the most magical day seeing all of our friends and family dote all over our favorite human. Nothing gets better than that.




What do you think?